Friday, April 27, 2012
Cool Cupcakes!

Mini Oreo Cheesecakes
Mini Oreo Cheesecakes Recipe!!
I have seen this Recipe in so many places (tumblr.com, Pinterest.com, Foodnetwork.com) and I have always wanted to try them! I never really got around to it because I thought it was going to be way to hard to make, but when I read the "How To".. it actually wasn't so bad! So I decided to make them! I was so exited, I went to the store, go all the stuff to make it, followed the instructions and baked them. When I was waiting for them to cool off, I went to watch TV upstairs. Well, 2 hours latter I was reminded by the growl in my stomach, and went down stairs for my well deserved treat... but to my surprise, my brother and his friends ate them all. I guess I will never know how they taste, because I am way to lazy to make them all over again. But I hope you enjoy them.. tell me how they are!Makes 30
Ingredients:
42 cream-filled sandwich cookies, such as Oreos, 30 left whole, and 12 coarsely chopped
2 pounds cream cheese, room temperature
1 cup sugar
1 tsp vanilla extract
4 large eggs, room temperature, lightly beaten
1 cup sour cream
Pinch of salt
1. Preheat oven to 275 degrees. Line standard muffin tins with paper liners. Place 1 whole cookie in the bottom of each lined cup.
2. With an electric mixer on medium high speed, beat cream cheese until smooth, scraping down sides of bowl as needed. Gradually add sugar, and beat until combined. Beat in vanilla.
3. Drizzle in eggs, a bit at a time, beating to combine and scraping down the sides of the bowl as needed. Beat in sour cream and salt. Stir in chopped cookies by hand.

4. Divide batter evenly among cookie-lined cups, filling each almost to the top. Bake, rotating pan halfway through, until filling is set, about 22 minutes. Transfer to wire racks to cool completely. Refrigerate at least 4 hours (or up to overnight). Remove from tins just before serving.
Friday, March 23, 2012
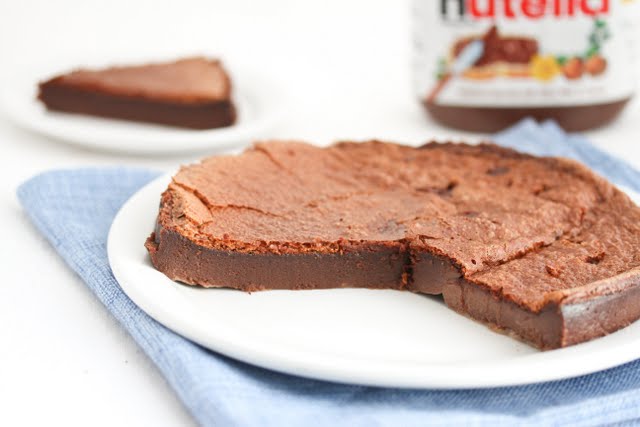
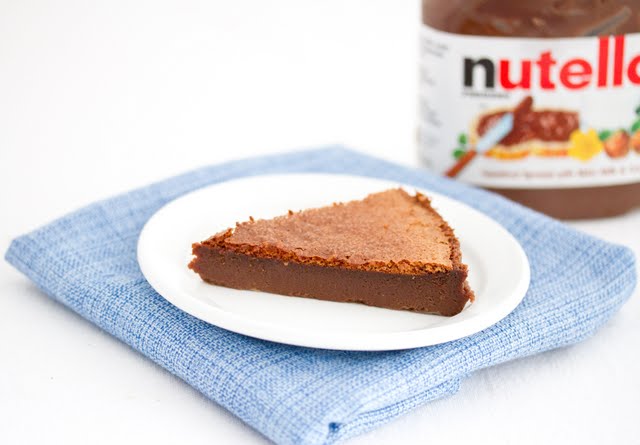
Nutella Lava Cake
When I came across this cake on Pinterst.com, I was so confused.. It says it was only 2 ingredients!Yes, it’s only 2 ingredients. And I mean really two ingredients. Not one of those recipes that say two or three ingredients and then one of the ingredients is something like “pre-made dough” or “cake mix.” (Not that there is anything wrong with those recipes.) This cake can be dangerous.. BEWARE. You are literally eating pure Nutella...With only 2 ingredients, it is by definition the most simple cake to make!
I have always loved Nutella! My dad used to put something similar on my sandwiches when I lived in Israel. In Israel, we have "Shachar", pretty much the same thing.. but, like everything else in Israel, better... My family has always been obsessed with the stuff! We make toast in the morning with it, put it on bananas, and (my personal favorite) on matzoh during Passover.
Anyways, I hope you enjoy this as much as I did!
ingredients:
4 eggs
8 1/2 ounces Nutella
directions:
2. Measure out Nutella into a glass bowl. Microwave Nutella for about 20 seconds to make it softer. Add in 1/3 of the egg mixture. Fold with a spatula in a clockwise direction until all of the egg is mixed in. Then add another 1/3 of egg mixture and fold again until no egg streaks remain. Pour in remaining third and repeat.
Monday, March 12, 2012
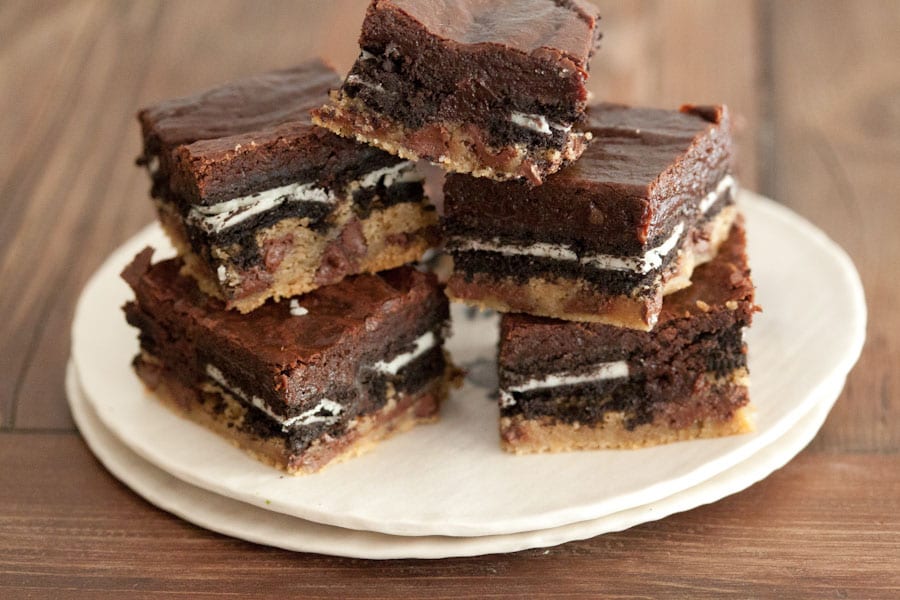
"Slutty Brownies"
I found this recipe on PINTEREST... my single handedly most time consuming obsession. It pretty much like "War of Warcraft" for women... I literally sit there living vicariously through other people's pictures planing trips and parties that I will never get around to doing. Food is another huge tease on Pinterest, there are sooo many amazing recipes that I will never make, but this one is so easy I just may get around to it.
Ingredients
- 10 tbsp unsalted butter
- 1 1/4 cups white sugar
- 3/4 cup cocoa powder
- 1/2 tsp salt
- 2 tsp vanilla extract
- 2 large eggs
- 1/2 cup AP flour
- 1 package of Oreo (regular stuffed or double stuffed)
- 1 cup unsalted butter (at room temp)
- 1/2 cup brown sugar
- 1 1/2 cup white sugar
- 2 eggs
- 2 1/2 tsp vanilla extract
- 2 1/2 cup AP flour
- 1 tsp salt
- 1 tsp baking soda
- 1 tsp baking powder
- 2 cups semi-sweet chocolate chips
For the Brownie layer:
For the Oreo layer:
For the Cookie Dough layer:
Instructions
- For the Brownie layer:
- In a medium sauce pan, melt the butter over medium high heat. Add the sugar and cocoa powder once the butter is melted. Whisk to combine and remove from heat. Add the salt, vanilla and eggs and continuously whisk until the eggs are combined. Add the flour and continue to mix. Set batter aside.
- For the Cookie Dough layer:
- Cream together the butter and sugars in a mixer. Add the eggs and vanilla, making sure to scrape down the sides of the mixing bowl. Add the flour, salt, baking soda and baking powder and mix on low until everything is incorporated. Fold in the chocolate chips. Set dough aside.
- Assembly:
- Pre-heat the oven to 350 degrees.
- Line the bottom of a 9x9 baking pan with tin foil and then spray the tin foil with a layer of baking spray.
- Layer 1/2 of the cookie dough on the bottom of a 9x9 baking pan, pressing down to form the bottom of the slutty brownies. Reserve the remaining cookie dough to be used to make cookies later in the day.
- Layer as many oreos that will fit on top of the cookie dough. No need to overlap. One single layer will do.
- Pour the brownie batter on top of the oreo layer and make sure it's evenly layers on top.
- Bake for 30-35 minutes. Test with a knife to see if the center is done. If the knife comes out clean, let the brownies rest before serving. If the knife comes out with batter still on it, allow the brownies to bake about 5 minutes more.
- Serve with milk!
Tuesday, February 28, 2012
Chocolate Chip Peanut butter Balls
Ingredients:
1 Jar of peanut butter (creamy works best)
2 1/2 cups of powdered sugar
1 bag of mini chocolate chips
10 oz of Semi sweet chocolate (to melt an coat with)
- Place peanut butter in the bowl of an electric mixer. Gradually beat in sugar at medium-low speed until well blended. Stir in Mini Chocolate Chips.
- Roll into 66, 1” balls, place in a single layer on waxed paper-lined pan. Freeze 1 hour. Melt the chocolate a few minutes before removing peanut butter balls from freezer.
- Dip ball in chocolate; gently shake off excess chocolate. Return balls to pan. Refrigerate 30 minutes or until chocolate is firm. Keep refrigerated.
Monday, February 27, 2012
Baked S'mores!!!
The idea is very simple, it is one layer of cookie, another of chocolate bars, then marshmallow spread and lastly, another cookie layer. Bake it in the oven and enjoy! You can't get any easier! All of the chocolate melts with marshmallow but they stay in the little sandwich shape! The only thing that is missing is the camp fire!
I got this "How To" recipe from http://www.theaprongal.com/2011/11/baked-smores.html.
Ingredients
1/2 cup butter, room temperature
1/4 cup brown sugar
1/2 cup sugar
1 large egg
1 tsp vanilla
1 1/3 cups flour
3/4 cup graham cracker crumbs (approximately 7 full graham crackers)
1 tsp baking powder
1/4 tsp salt
2 or 3 super-sized (5 oz.) chocolate bars (e.g. Hershey’s)
1 1/2 cups marshmallow creme/fluff (not melted marshmallows)
Directions
Preheat oven to 350. Grease bottom of **8 by 8 or 11 by 7.
**Note, I have only made these in an 11 by 7 and a reader who made them in an 8 by 8 said she thought the marshmallow was too thick in that size pan. I personally loved the thinner bar in the 11 by 7, but you can do whichever you prefer, the only difference is adding an additional large Hershey's bar as seen in my pictures above.
In a large bowl or stand mixer, cream together butter and sugar until light. Beat in egg and vanilla.
In a small bowl, whisk together flour, graham cracker crumbs, baking powder and salt.
Add to butter mixture and mix at a low speed until combined.
Divide dough in half and press half of dough into an even layer on the bottom of the prepared pan.
Place chocolate bars over dough. Two 5 oz. Hershey’s bars should fit perfectly [for 8 by 8] side by side, but break the chocolate (if necessary) to get it to fit in a single layer. [use 3 Hershey's for 11 by 7 pan]
Spread marshmallow fluff evenly over the chocolate layer.
Place remaining dough in a single layer on top of the creme. This is most easily done by putting the second half of the dough in a gallon size freezer bag. Use your palms or rolling pin to flatten it out, and then use scissors to cut down both long sides of the bag, so it will open up book-style. Open it up carefully, and the dough will stick on one side of the bag. Then place the bag, dough side down, on the other three layers. From there peel the bag up and carefully spread the dough where it is uneven.

Bake for 30 to 35 minutes, until lightly browned. Cool completely or almost completely for the melty factor before cutting into bars.
Friday, February 24, 2012
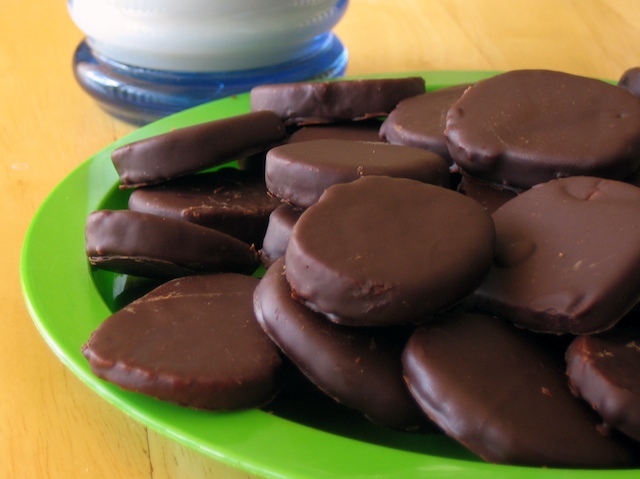
Wana Be Girl Scout Cookies
Every one has a favorite.. Girl Scout cookies are iconic! My personal favorites are the Thin Mints. They are small, minty, chocolaty and crispy! Ever since I was a Girl Scout myself, I have craved Thin Mints. When I when to Girl Scout camp, we used to use the Thin Mints as gram crackers for our smores... they are addicting, you have been warned.


Thin Mints are Americas cookie. Every time its Girl Scout season, there are Thin Mint flavored treats every were. I have seen Thin Mint ice cream,Thin Mint shooters, Thin Mint Blizzard from DQ, Thin Mint pie.. and the list goes on.
So that brings us to the "Wana Be Girl Scout Cookies". They are fun to do at home and you don't have to wait for Girl Scout season to make them! There are a few steps involved, but hey... they are Thin Mints.
THE COOKIE:
2 1/4 cups all purpose flour
1/4 cup cornstarch
6 tbsp unsweetened cocoa powder
1/2 tsp salt
1 cup white sugar
1/2 cup butter, room temperature
1/3 cup milk (any kind)
1/2 tsp vanilla extract
In a small bowl, whisk together flour, cornstarch, cocoa powder and salt.
In a large bowl, cream together butter and sugar. With the mixer on low speed, add in the milk and the extracts. Mixture will look curdled. Gradually, add in the flour mixture until fully incorporated.
Shape dough into two logs, about 1 1/2 inches (or about 4 cm) in diameter, wrap in plastic wrap and freeze for at least 1-2 hours, until dough is very firm.
Preheat oven to 375F.
Slice dough into rounds not more than 1/4 inch thick – if they are too thick, they will not be as crisp – and place on a parchment lined baking sheet. Cookies will not spread very much, so you can put them quite close together.
Bake for 13-15 minutes, until cookies are firm at the edges. Cool cookies completely on a wire rack before dipping in chocolate.

Thin Mints are Americas cookie. Every time its Girl Scout season, there are Thin Mint flavored treats every were. I have seen Thin Mint ice cream,Thin Mint shooters, Thin Mint Blizzard from DQ, Thin Mint pie.. and the list goes on.
So that brings us to the "Wana Be Girl Scout Cookies". They are fun to do at home and you don't have to wait for Girl Scout season to make them! There are a few steps involved, but hey... they are Thin Mints.
THE COOKIE:
2 1/4 cups all purpose flour
1/4 cup cornstarch
6 tbsp unsweetened cocoa powder
1/2 tsp salt
1 cup white sugar
1/2 cup butter, room temperature
1/3 cup milk (any kind)
1/2 tsp vanilla extract
3/4 tsp peppermint extract
CHOCOLATE COATING:
10-oz dark or semisweet chocolate
1/2 cup butter, room temperature
In a large bowl, cream together butter and sugar. With the mixer on low speed, add in the milk and the extracts. Mixture will look curdled. Gradually, add in the flour mixture until fully incorporated.
Shape dough into two logs, about 1 1/2 inches (or about 4 cm) in diameter, wrap in plastic wrap and freeze for at least 1-2 hours, until dough is very firm.
Preheat oven to 375F.
Slice dough into rounds not more than 1/4 inch thick – if they are too thick, they will not be as crisp – and place on a parchment lined baking sheet. Cookies will not spread very much, so you can put them quite close together.
Bake for 13-15 minutes, until cookies are firm at the edges. Cool cookies completely on a wire rack before dipping in chocolate.
In a microwave safe bowl, combine chocolate and butter. Melt on high power in the microwave, stirring every 45-60 seconds, until chocolate is smooth. Chocolate should have a consistency somewhere between chocolate syrup and fudge for a thin coating.
Dip each cookie in melted chocolate, turn with a fork to coat, then transfer to a piece of parchment paper or wax paper to set up for at least 30 minutes, or until chocolate is cool and firm.
Reheat chocolate as needed to keep it smooth and easy to dip into.
Dip each cookie in melted chocolate, turn with a fork to coat, then transfer to a piece of parchment paper or wax paper to set up for at least 30 minutes, or until chocolate is cool and firm.
Reheat chocolate as needed to keep it smooth and easy to dip into.
Subscribe to:
Posts (Atom)